Here is part two of our three part series on building levels. Last week we discussed how we design monster behaviors. This week, we touch on how we populate our levels with the enemies we’ve specified.
PART 2 - SPECIFYING MAP PARTS
A. TOOL SPOTLIGHT - STARBREAK® ARCHITECT
The StarBreak® Architect is a tool that was developed in-house and written in C++ and uses the wxWidgets GUI library. The StarBreak® Architect allows us to control of many different aspects of map part generation in an intuitive and graphical way, including terrain placement and enemy configuration.
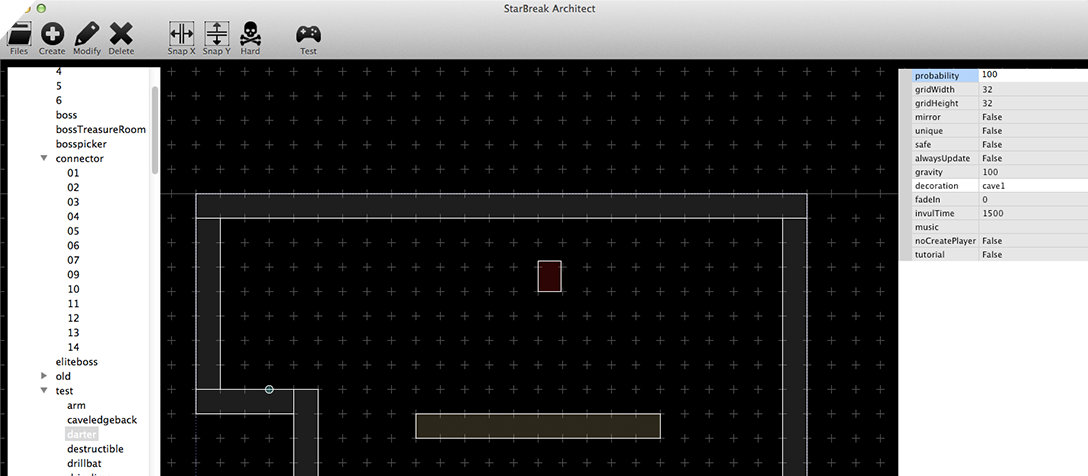
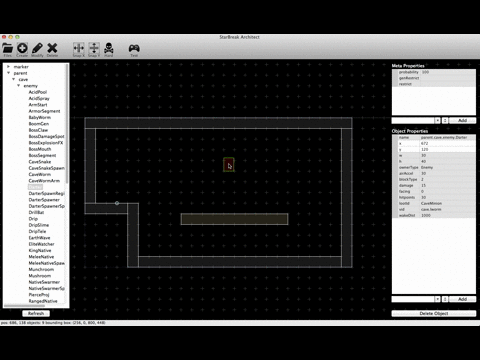
When the StarBreak® Architect is first launched, it might look something like this:
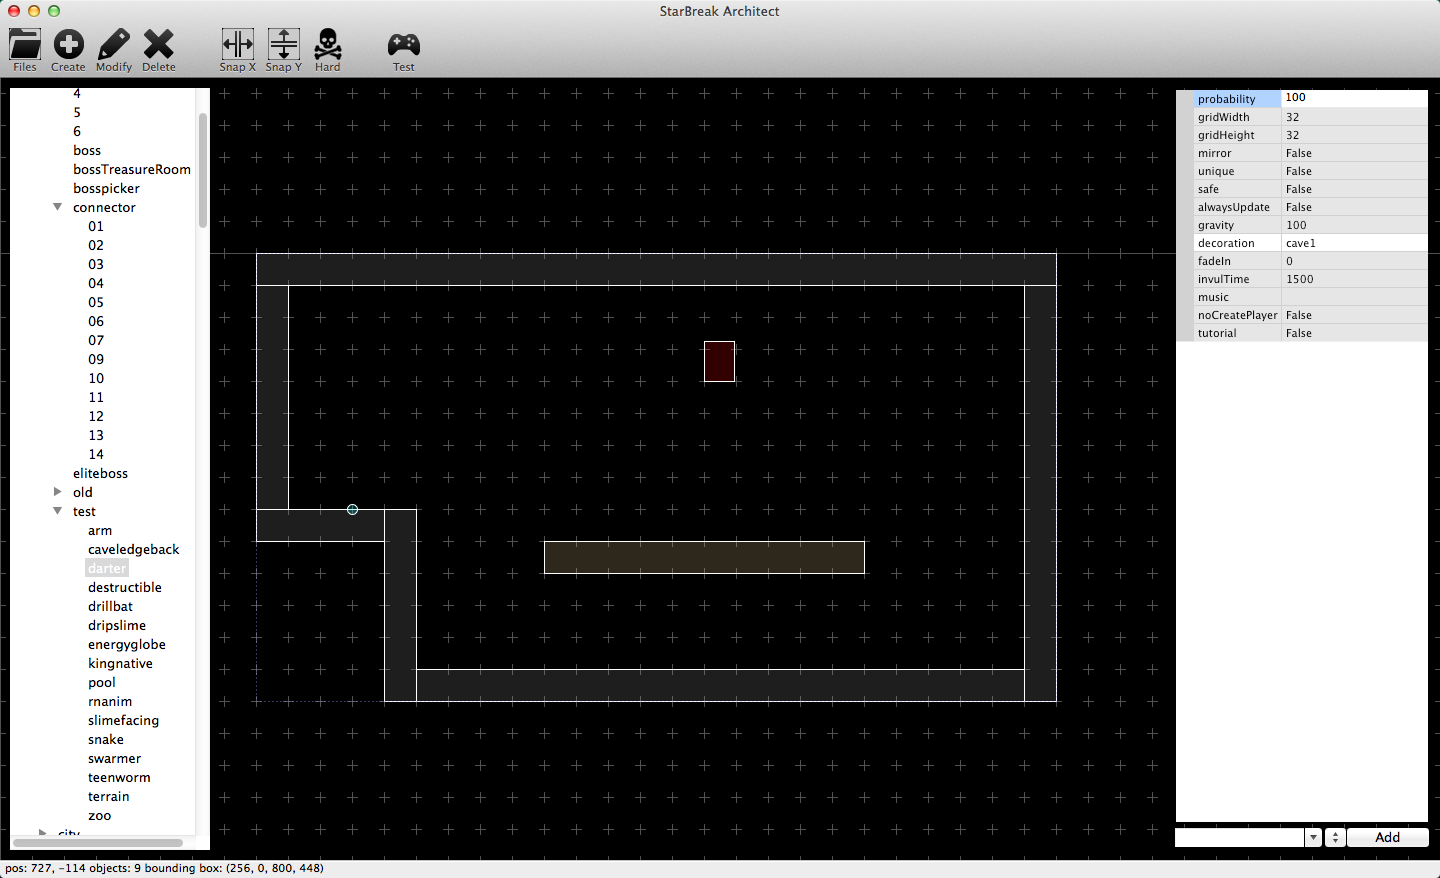
The buttons at the top of the StarBreak® Architect provide many different features:
- Files: open a map or map part
- Create: place different objects within a map or map part
- Modify: modify the position, size, or properties of an object within a map or map part
- Delete: remove an object within a map or map part
- Snap X: toggle between free-form and constrained pixel-placement in the x-direction
- Snap Y: toggle between free-form and constrained pixel-placement in the y-direction
- Hard: toggle between elite mode and normal mode for a map or map part
- Test: run the presented map or map part in the local client
Many of these features will be highlighted in more detail below as we describe how we use the StarBreak® Architect when generating map parts. In addition, the StarBreak® Architect has many traditional features you would expect from an editor, such as save, save-as (useful for quickly cloning parts to be edited into new parts), load, copy (e.g., copy an object to be pasted in other places or in other map parts), and paste
With a few exceptions such as boss maps, Eschaton station, etc., maps in StarBreak are generated from a collection of map parts. A discussion of how maps are generated from map parts will be presented in next week’s blog post. For this discussion its important to note that, as the name implies, map parts are generally building blocks used in the generation of maps. But the StarBreak® Architect is generally agnostic to the difference and we can load, edit, and save maps as easily as we can map parts. Although we typically do this only for test maps as we want our production maps to be generated anew each time a player enters.
B. PUTTING THE PIECES IN PLACE In general, map parts are a collection of objects that are placed into the part by the designer. A designer can place platforms, ledges, enemies, midground elements, interactable items (e.g., switches and doors) and other player facing objects, using a simple point-and-click workflow. For example, this gif illustrates placing a darter into a test part:
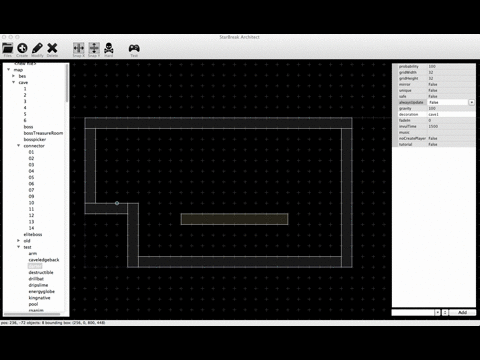
To help to the designer better see what they are working with, we have colored coded objects:
- Grey: Platforms
- Brown: Ledges
- Red: “Enemy” objects (elements in the environment that can be damaged by players; not all enemy objects can do damage to players. An example of this is destructible terrain)
- Blue: Non-enemy objects (usually reserved for midground pieces and interactable objects)
- Yellow: “Player” objects (for elements in the environment that can be damaged by enemies)
The designer can also place non-player facing objects into the map part as well. These might be objects that are hidden from the player for various reasons. As we mentioned in last week’s post, most boss encounters include many moving parts that need to be controlled by a centralized set of logic to coordinate it all. One way this can be done is to include a “watcher” that is hidden from the players whose purpose is to assess the status of the various boss elements and changes the behavior of each of those elements accordingly.
After all of the elements have been placed into a map part, the part can be testing using the “Test” functionality. An example of that can be seen here:
You’ll notice that what when we execute the test, what once was a somewhat drab block world comes alive with our in-game assets. This lets us see how parts would play individually before they can be used in the generation of maps. If we are not happy with how a particular map part is performing, we can use the “Modify” functionality to change the positioning of an object, the size of an object, and the parameters of an object, to name a few examples. We show what a few of those operations look like below, again using simple a click-and-drag workflow:
One of the most important aspects of the map-part-generation workflow is in the configuration of individual objects within the map part. The complexity of each object and the parameters exposed to the designer by the StarBreak® Architect are specified by the Lua code that defines each object. Here is an example property panel from an object that randomly picks from a subset of types of Scavenger in the Graveyard:
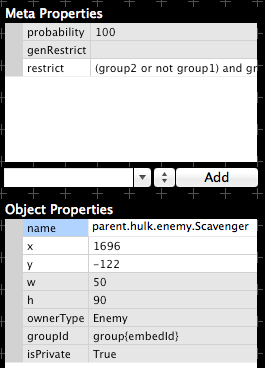
As you can see, even a fairly simple object has a number of different configurable parameters that can be specified. While it’s beyond the scope of this post to discuss them all in detail, the ones most germane to the composition of a room as viewed from the standpoint of the player are:
- probability: the percent chance of the particular object being included in the map part (should all other restrictions be met)
- genRestrict and restrict: any restrictions that must be met for this particular object to be included in the map part. Both genRestrict and restrict use traditional logic statements and can vary in complexity according to the needs of the designer. The illustrated restrict logical statement “(group2 or group1) and not group12” is one of the more complicated statements that we have used to date. The primary difference between genRestrict and restrict is that genRestrict are restrictions on generated maps while restrict is restrictions on particular map parts.
- isPrivate: whether the object is known to the player’s client (false) or hidden server-side (true).
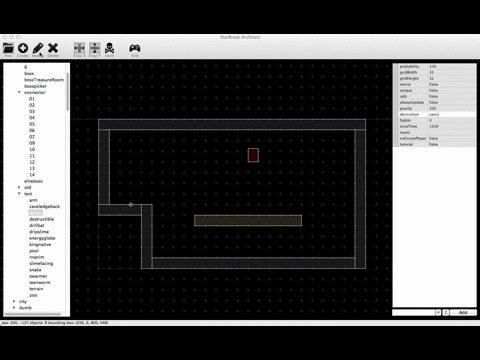
If the designer is satisfied with the composition of a map part and the objects contained therein, they may want to change parameters of that map part that are used in the map generation process. The StarBreak® Architect provides a property pane like the one used for configuring objects to accomplish this task:
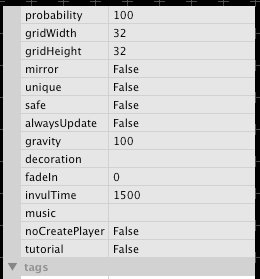
Again, there are a number of properties. Many of which are outside the scope of our discussion on map generation. Of the ones shown above, these are the most relevant to this post:
- probability: the percent chance that a particular map part is included in the bag of all possible map parts when a map is generated.
- mirror: whether the map part can be flipped arbitrarily (true) or not (false) when the map generator attempts to place the part within the map.
- unique: whether the map part can be chosen more than once (false) or only once (true) by the map generator when building a map.
- tags: these specify values that can be used in connection with an object’s restrict property. An example (albeit a complex example) of what tags look like are as follows:
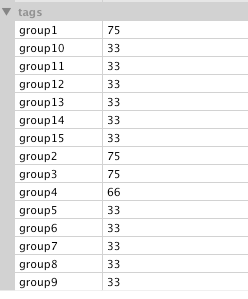
To better understand how these tags work, we can apply them to our example restrict statement to get a logical expression that reads: “if (random(100) <= 75 or random(100) <= 75) and not random(100) <= 33 then include the object.”
We will revisit the idea of probability, mirroring, and uniqueness in next week’s post when we discussion how we take all of these map parts and stitch them together to generate the floors you explore in StarBreak®.