Here is part three of our three part series on building levels. In part 2, we discussed how we build map parts using the StarBreak® Architect. This week, we touch on how we generate our maps using these map parts.
PART 3 - GENERATING LEVELS
A. MAP PART REFRESHER AND PART NOMENCLATURE
As we discussed in our last post, a designer can build maps parts using the StarBreak® Architect. We organize our map parts into one or more collections that together are used to generate maps, as we will discuss in more detail below. We typically generate maps on-demand using our collections of map parts, for example, when a player delves deeper into a zone (such as the Fungus Cave zone). But we can also hand-craft maps that include some procedural elements and store these maps for later use (e.g., the Eschaton Station, midboss maps, and boss maps). Today we'll be discussing how we we procedurally generate our on-demand maps using map parts.
The map parts themselves have certain characteristics that specify their respective type and control the manner in which they are used within a given map. We classify our map parts into five different types:
- Entrances
- Mids
- Branches
- Branch ends
- Exits
All map parts include at least one or more transitions. Transitions are the places on the map part where another map part can be attached. These transition components reside on the boundaries of the map part. The number and nature of these transitions determines its type as we will describe below:
1. ENTRANCES
An entrance has one and only one transition. Its other defining characteristic is that there is some mechanism that allows a player to enter the part. This usually consists of a portal that connects to Eschaton Station or a door that leads back to the previous level. In some situations, like bosses and midbosses, these doors are closed, preventing the player from returning to the previous level.
Unlike most map parts, we don’t allow entrances to mirror in order to create a consistent dialog with the player. Namely that doors facing right lead to the previous level in a zone and doors facing left lead to the next level.
Here is an example entrance, as shown in the Architect:
Note that the dashed line on the right is the single transition for this part that leads out of this part into the rest of the map.
Here is how that entrance looks in-game:
2. MIDS
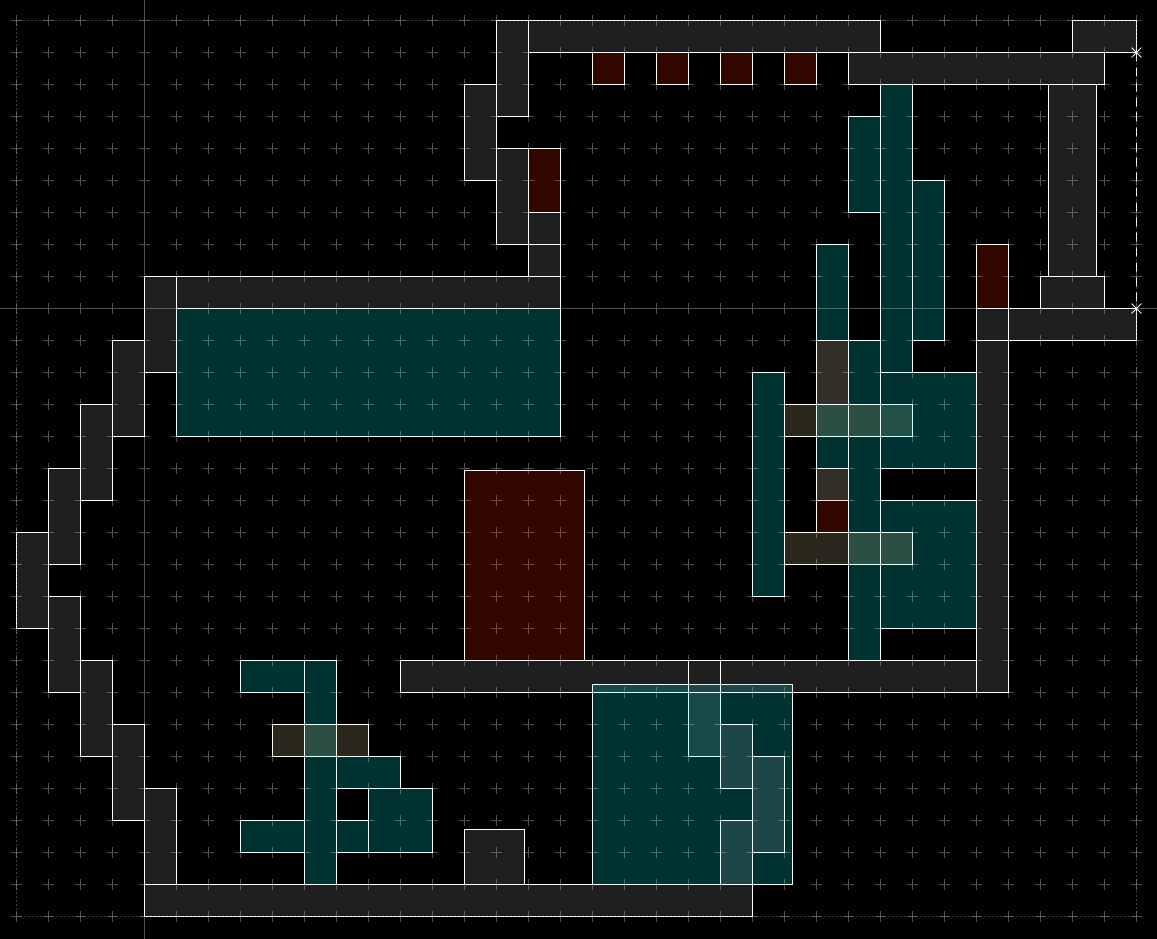
The defining characteristic of mid parts is that they include two and only two transitions. Here is an example cave mid part, as shown in the Architect:
Note the two transitions on either side of the part shown again as dashed lines.
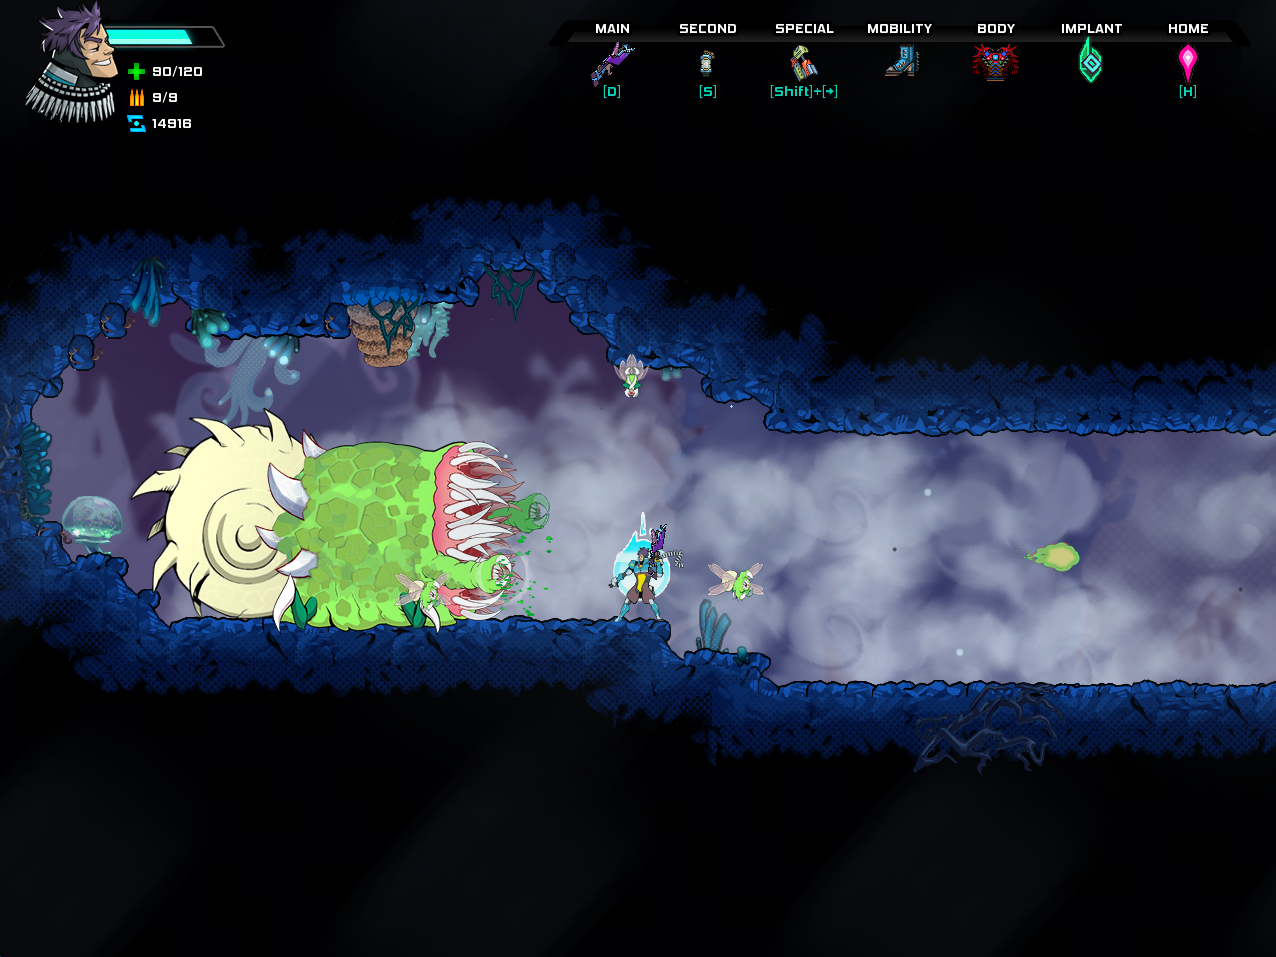
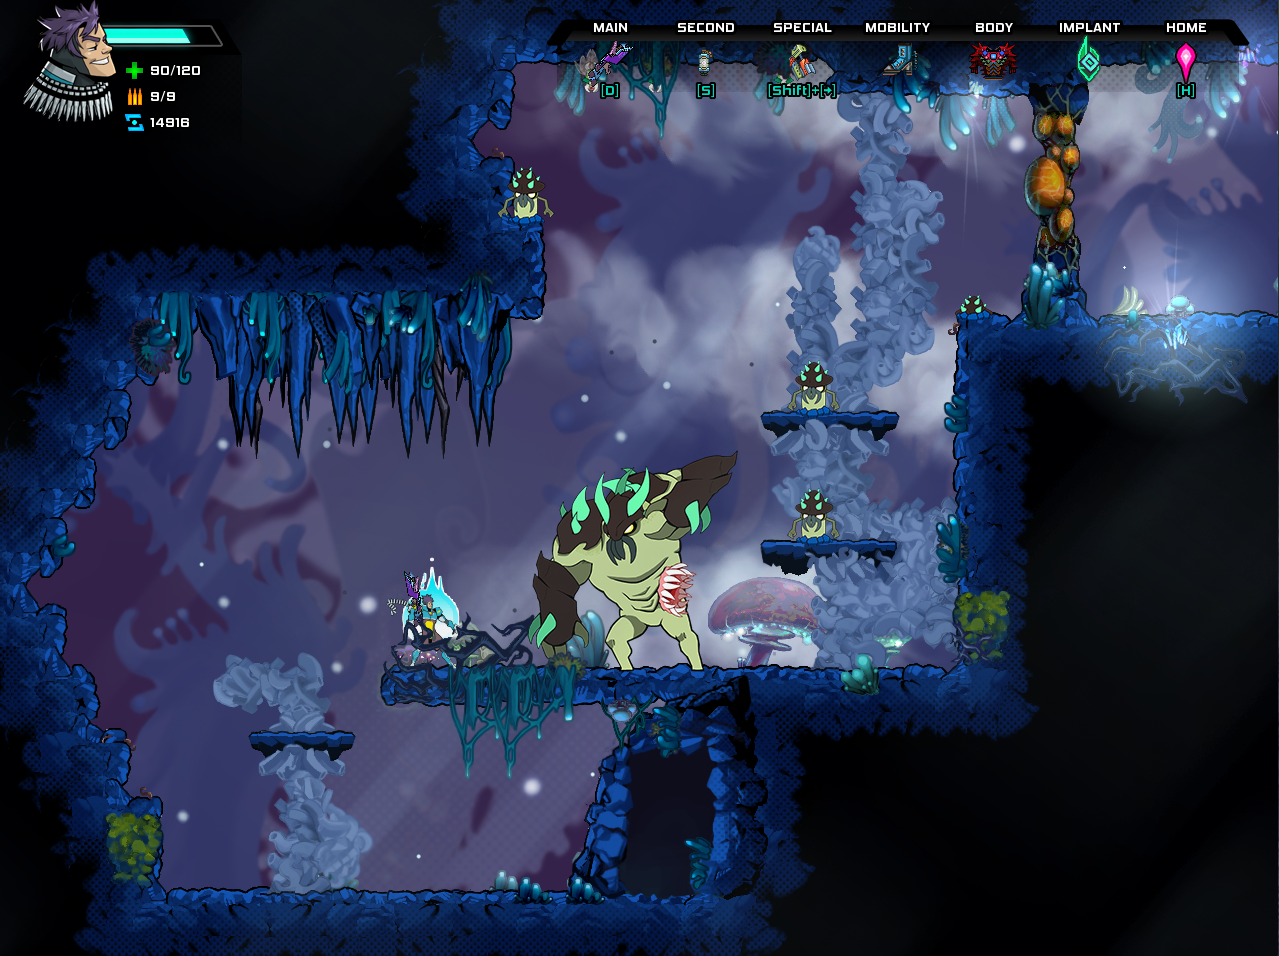
Here is how that mid part looks in-game:
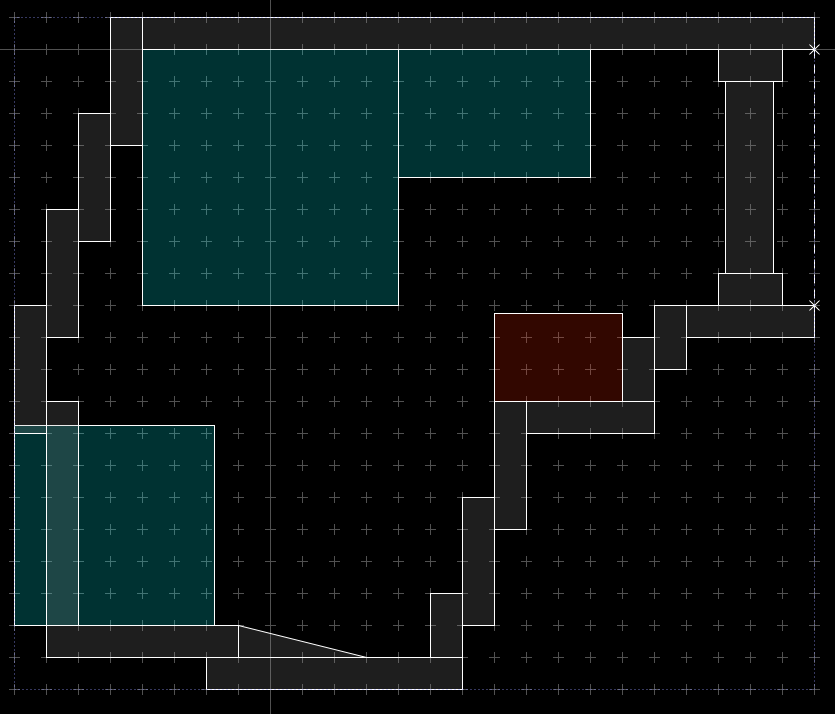
3. BRANCHES
The primary defining characteristic of a branch is that the map part include at least 3 transitions. This means that branch map parts provide the player a choice of two or more possible paths. In general, one path will lead to the exit and the other paths will be optional. These optional paths usually contain a treasure chest at the end.
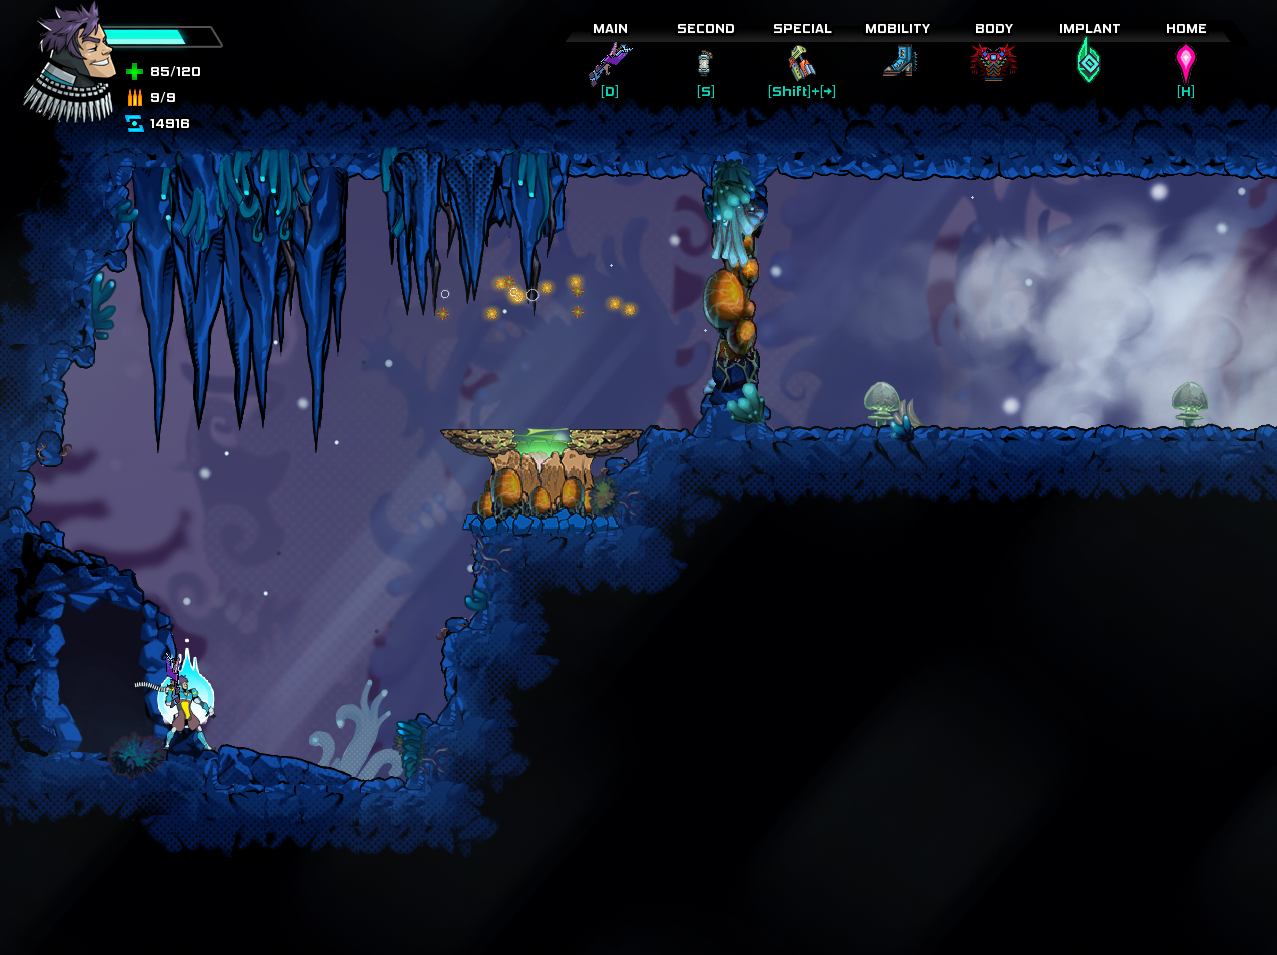
Here is an example cave branch, as shown in the Architect:
Note the three transitions: left, right, and up.
Here is how that branch part looks in-game:
4. BRANCH ENDS
The primary defining characteristic of a branch end is that these parts include one and only one transition, and do not include an exit to the next level. In general, a branch end will usually include a fight that results in a treasure chest and can contain other things such as a door to a secret room.
Here is an example cave branch end, as shown in the Architect:
Note the single transitions on the right.
Here is how that branch end looks in-game:
5. EXITS
Exits include a single transition and a door (or some other mechanism) that can be used to move to the next level.
Like entrances, we typically don’t allow exits to mirror for the reasons explained above: we want exit doors to always face left. That being said, the position of the exit map part is not necessarily constrained. That is, exits do not need to be the farthest right-most part of a map.
Here is an example cave exit, as shown in the Architect:
Note the single transition on the right and the door at the bottom which faces the left.
Here is how that exit looks in-game:
After specifying at least one start, one mid, and one exit, we are able to generate a map for a particular level. Certainly a map with only one start, one mid, and one exit would be incredibly simple (and boring), so we use branches and branch ends to spice things up when generating our maps.
B. GENERATING A MAP
The first thing the our map generation system looks at is a zone file. A zone file is a general specification which contains a list of levels. These particular levels are lua scripts (we’ll call them “level files”) that include the instructions of how to build a particular level. Most level files are very simple, containing:
- a list of map parts the generator will use
- the background art, music, and what tiles will be used to decorate the level
- how many map parts this level will use, and how it will branch (a process described below)
- special instructions to fill in unique features, like the lethal region at the bottom of the Strands
This information is sent to one of the map generators, as defined by the particular level file. We currently use two different map generators: a branching map generator (for most zones) and an expanding map generator (for most levels in the Graveyard). Today we will describe the "branching" generator. There are many differences between the two generators, but the most user facing difference is that our branching generator does not allow maps to generate loops (each branch must terminate with a branch end), while the expanding map generator has no such constraint and loops within the Graveyard are commonplace.
With respect to the branching map generator, the first thing the generator does is pick a map part that contains an entrance map part (e.g., a portal to Eschaton Station or a door that leads back to the previous level as described above). The branching generator then enters into a loop that doesn't finish until the level is complete, building out from the start.
Because, as we described above, every map part has one or more transition components it joins them by pairing their respective transitions. When doing this pairing, it respects transition size and horizontal/vertical orientation to ensure that the generated map is seamless. By having varying transition sizes, we restrict the types of parts that a transition can join to, allowing us to guide the layout to specific types of destinations (e.g., treasure boxes, exits, secrets, etc.) or along themes, like underground caves or vertical ascents. The chain of map parts that begins with the entrance and ends with the exit is called the main path. Individual map parts along this path may also include more than two transitions. When this happens, it creates a branch from the main path that end in treasure or dead ends.
The construction of these maps is very chaotic, and sometimes impossible arrangements are created where the space for a new map part is too constricted for any new piece to fit. Whenever a bad fit is encountered, the system tries again by picking a new random part. If too many failures occur, the map is scrapped and the process starts over.
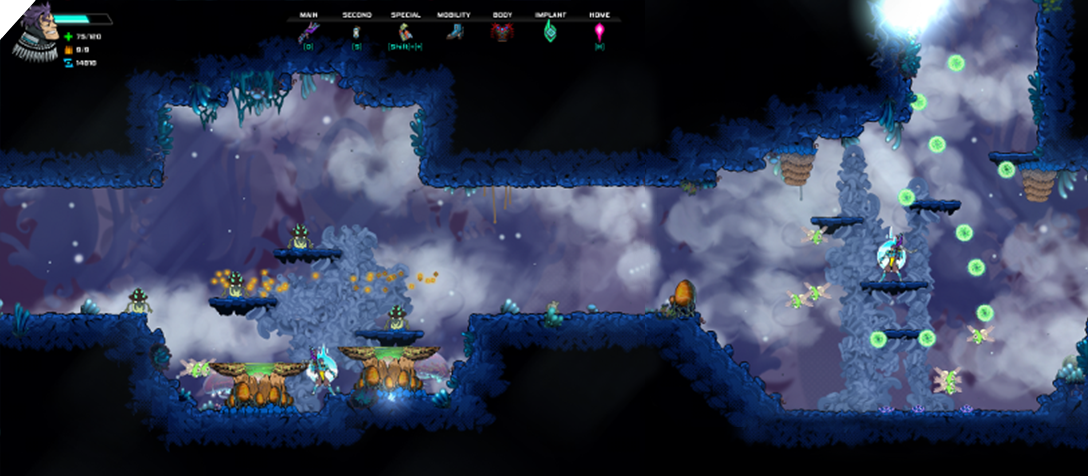
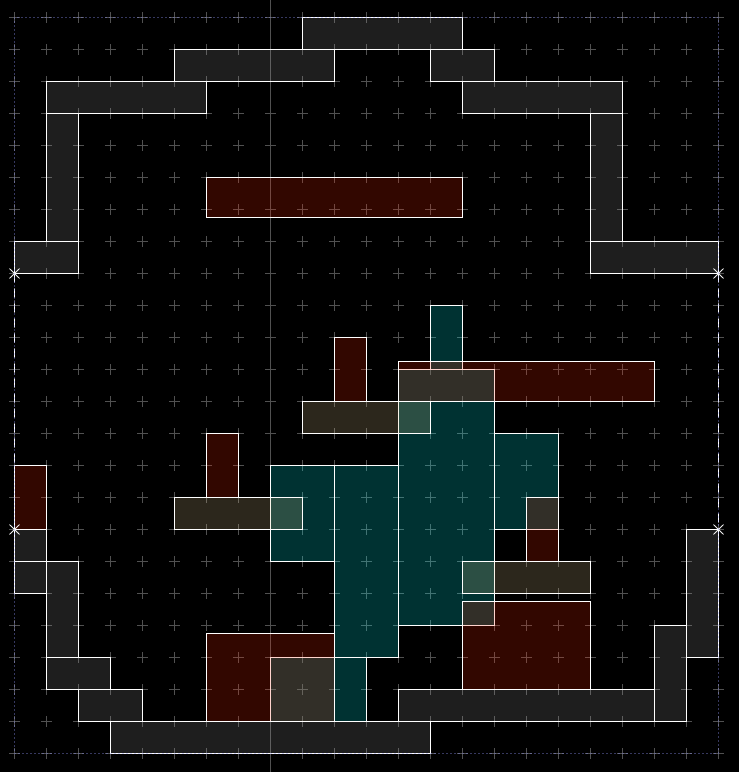
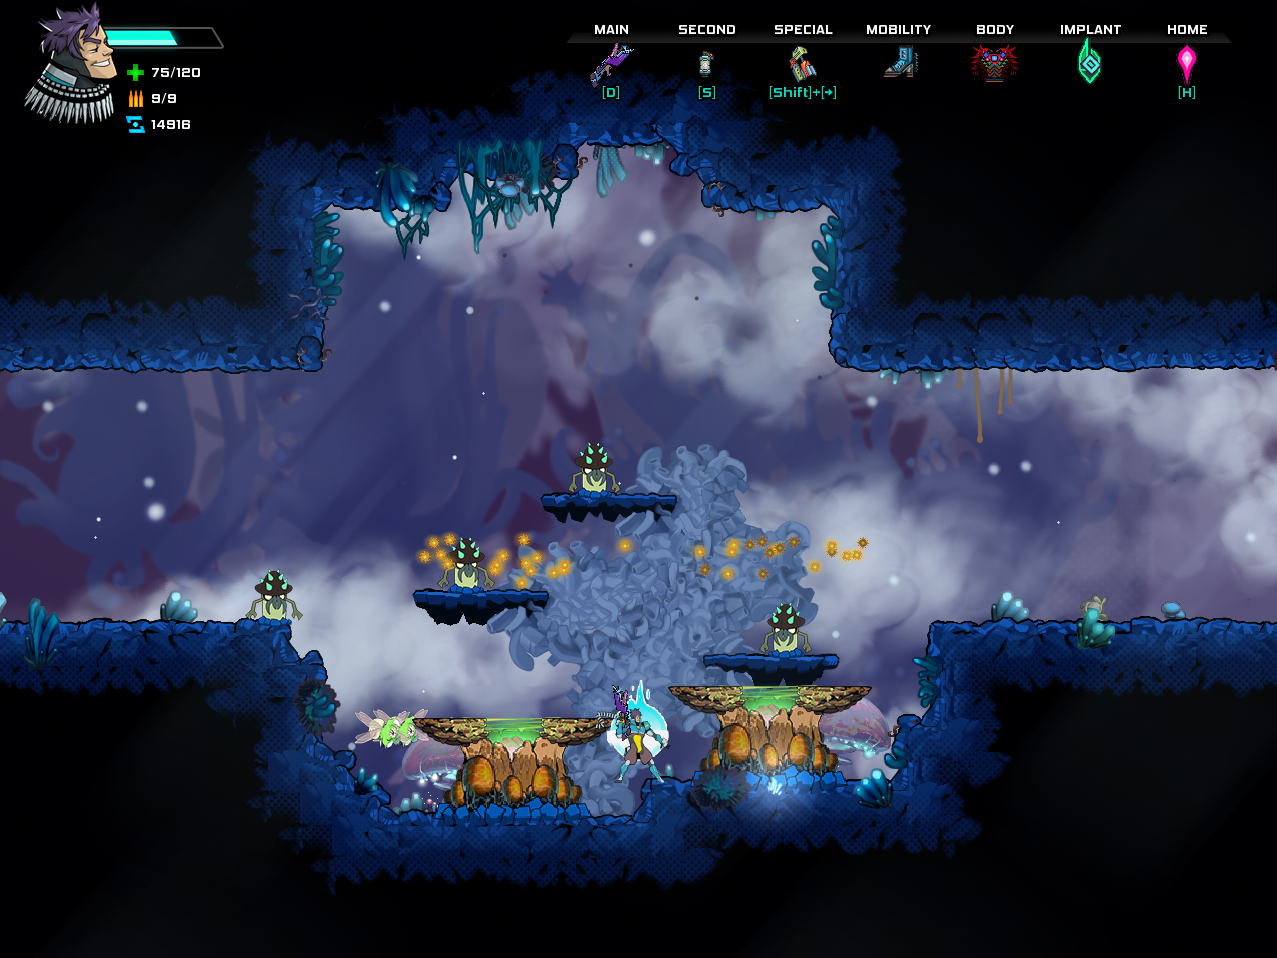
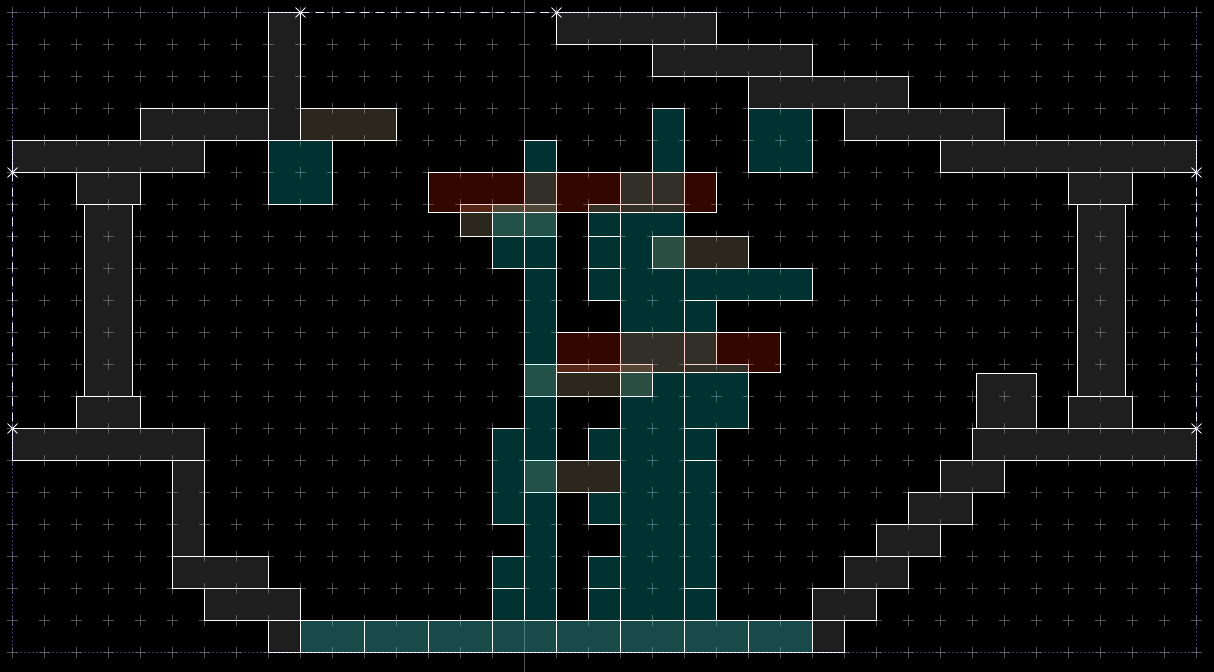
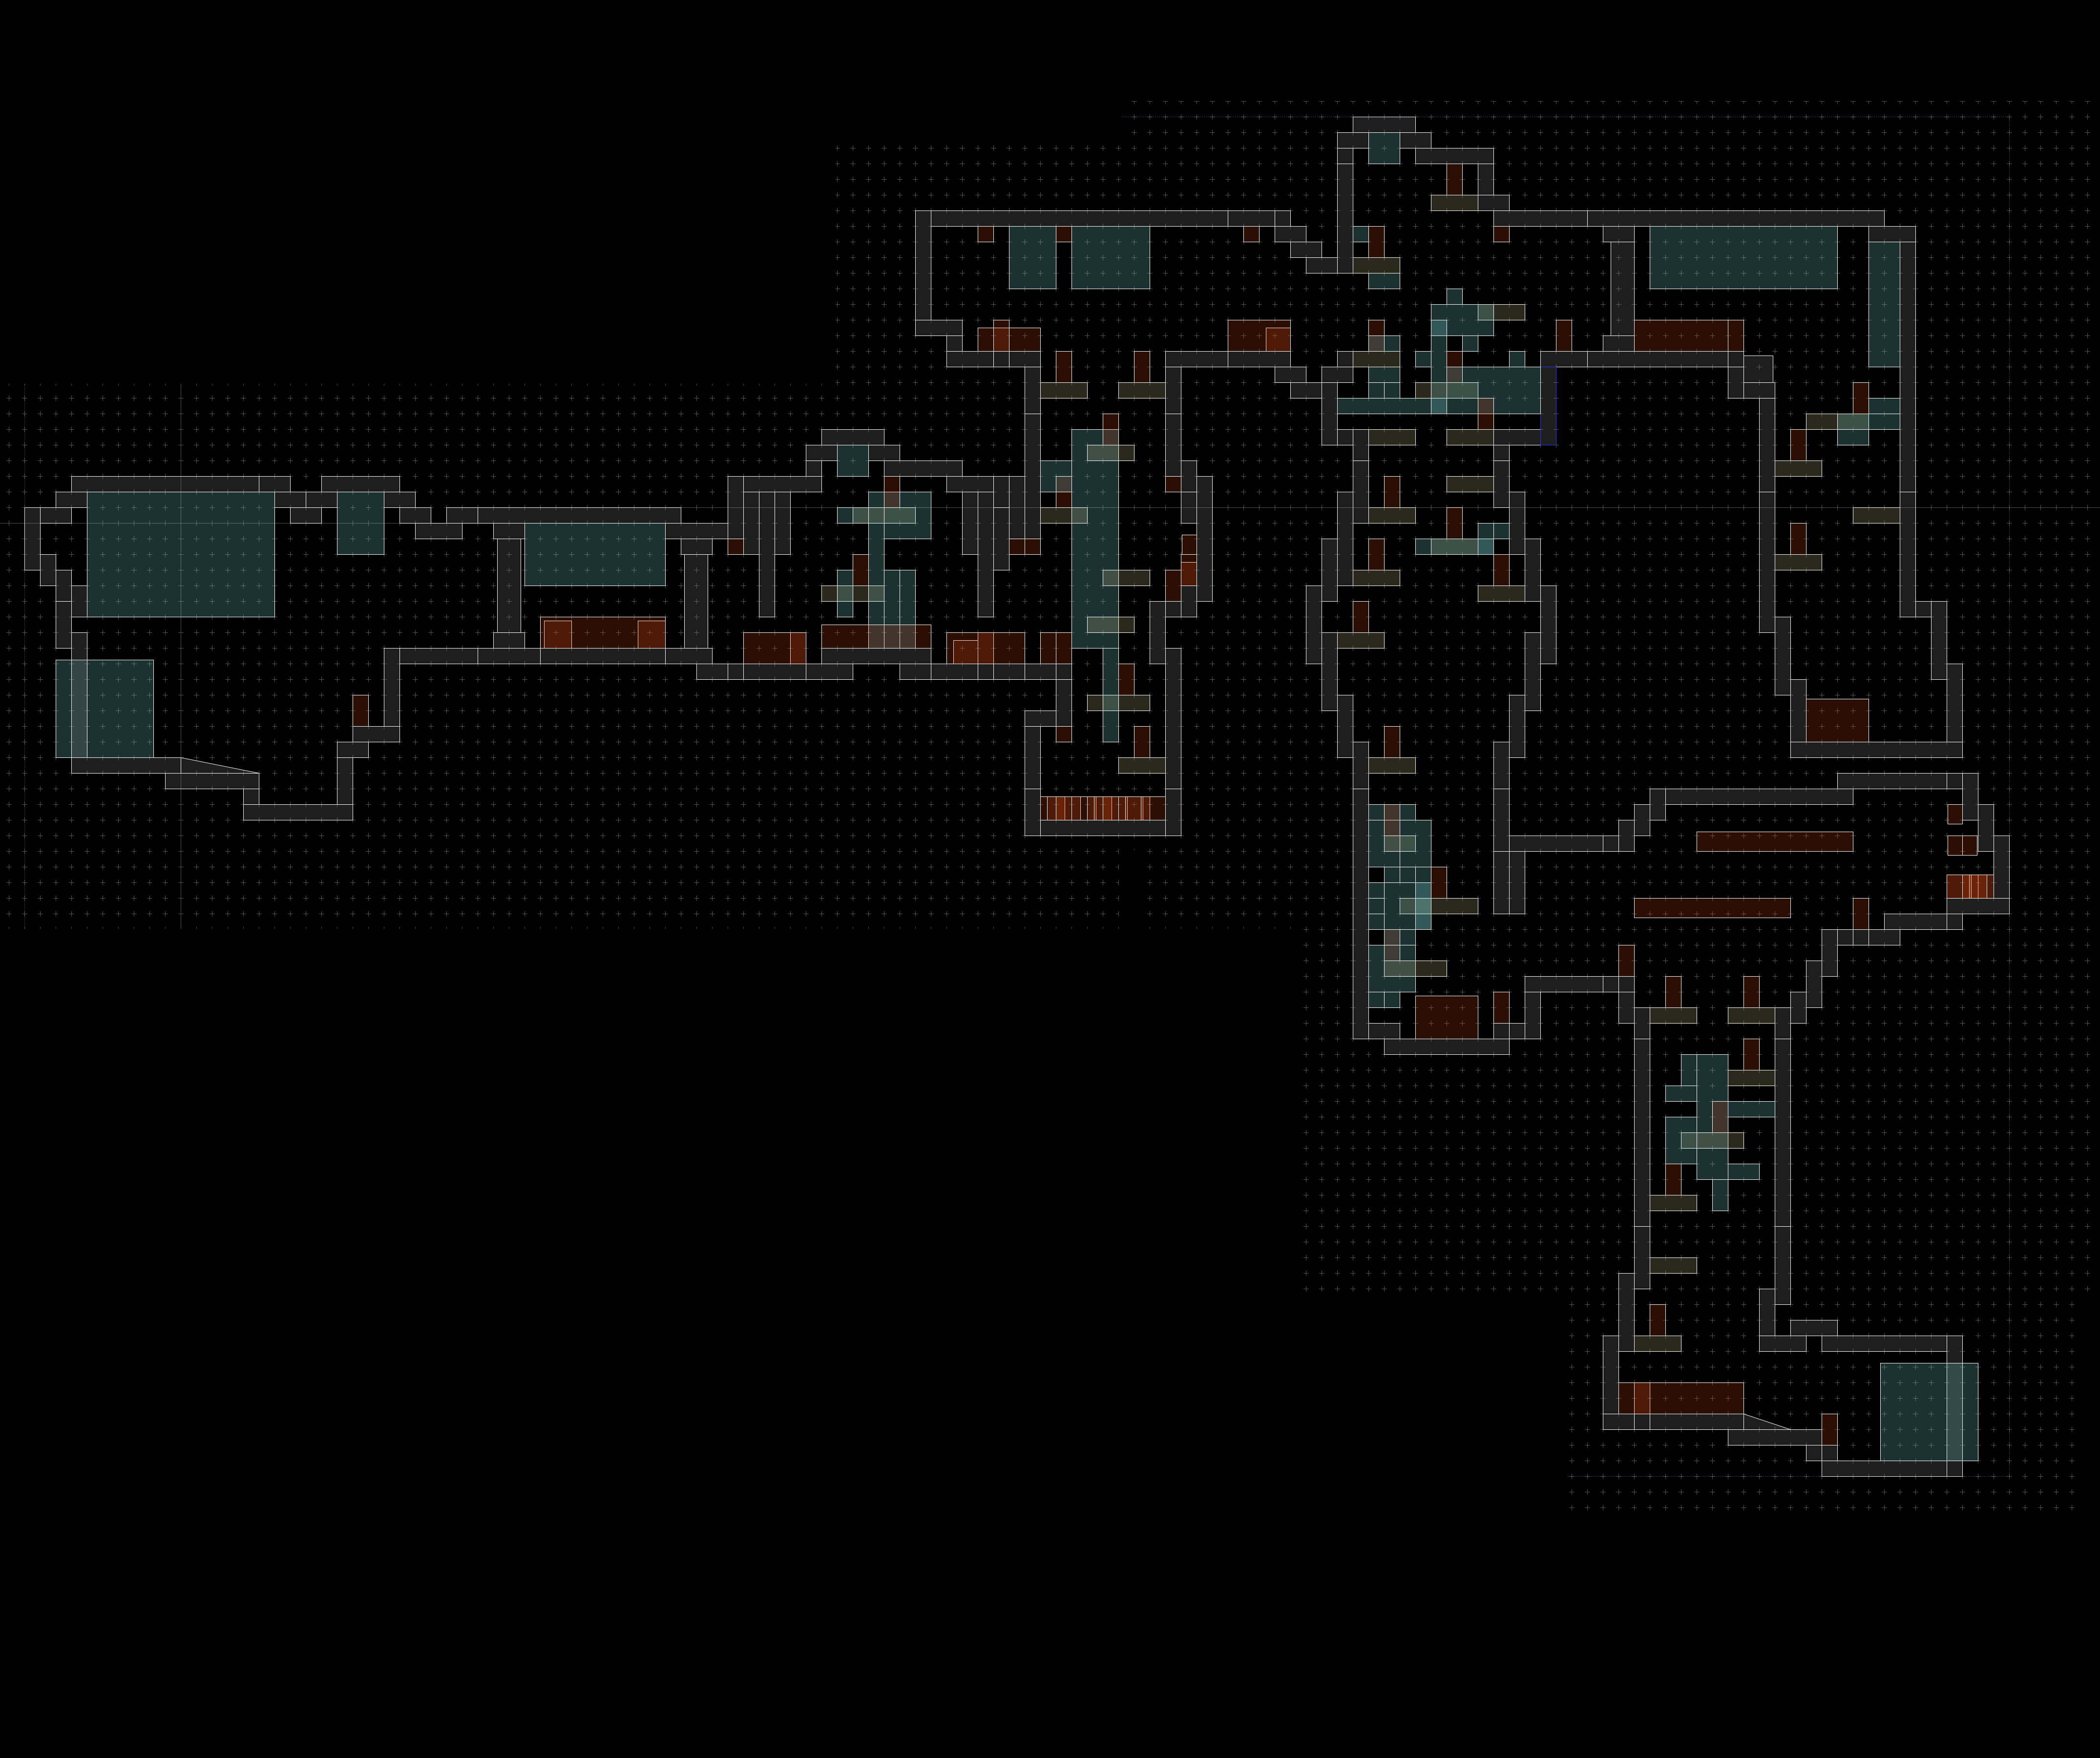
Here is what a finished map looks like in the Architect:
And here is the corresponding map in the game:

We hope you enjoyed our discussion of building levels in StarBreak®. Stay tuned for the start of our next discussion into our development process: the Art of StarBreak®.